$ redis-cli
$ SET hello podman
$ GET hello
Podman Desktop 1.1
Challenging movements between local developer environments and production deployments
Why: current challenges

Vision: simplifying the onboarding

Introducing Podman Desktop 1.1 Community Edition
Containers and Kubernetes for Application Developers
Podman, Kubernetes, OpenShift Local
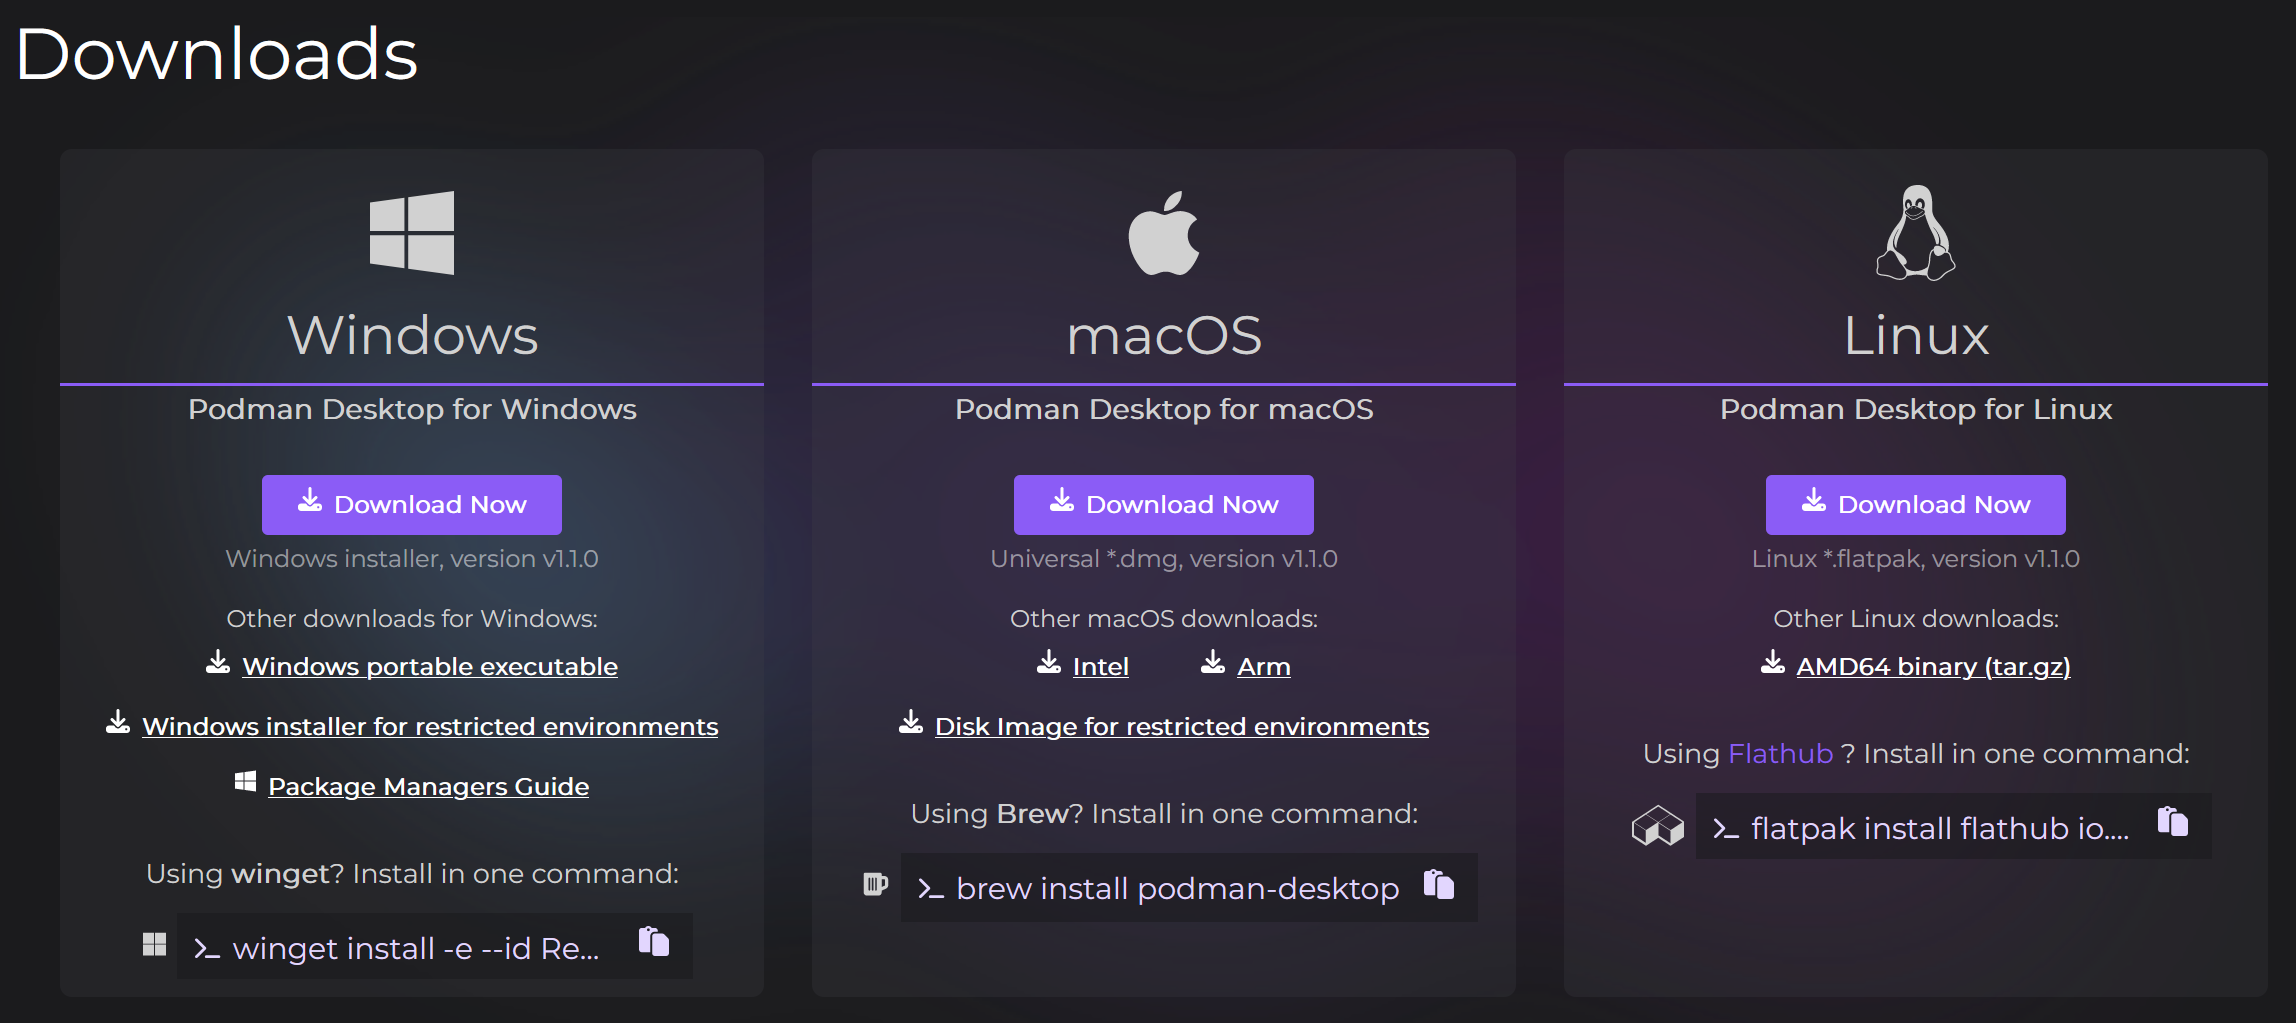
Install and run anywhere: Windows, macOS and Linux
Keep up-to-date
Containers and pods
Build, run, manage
Pods in your container engine
Multiple container engines
Compatible with Docker Compose
Ready for the enterprise
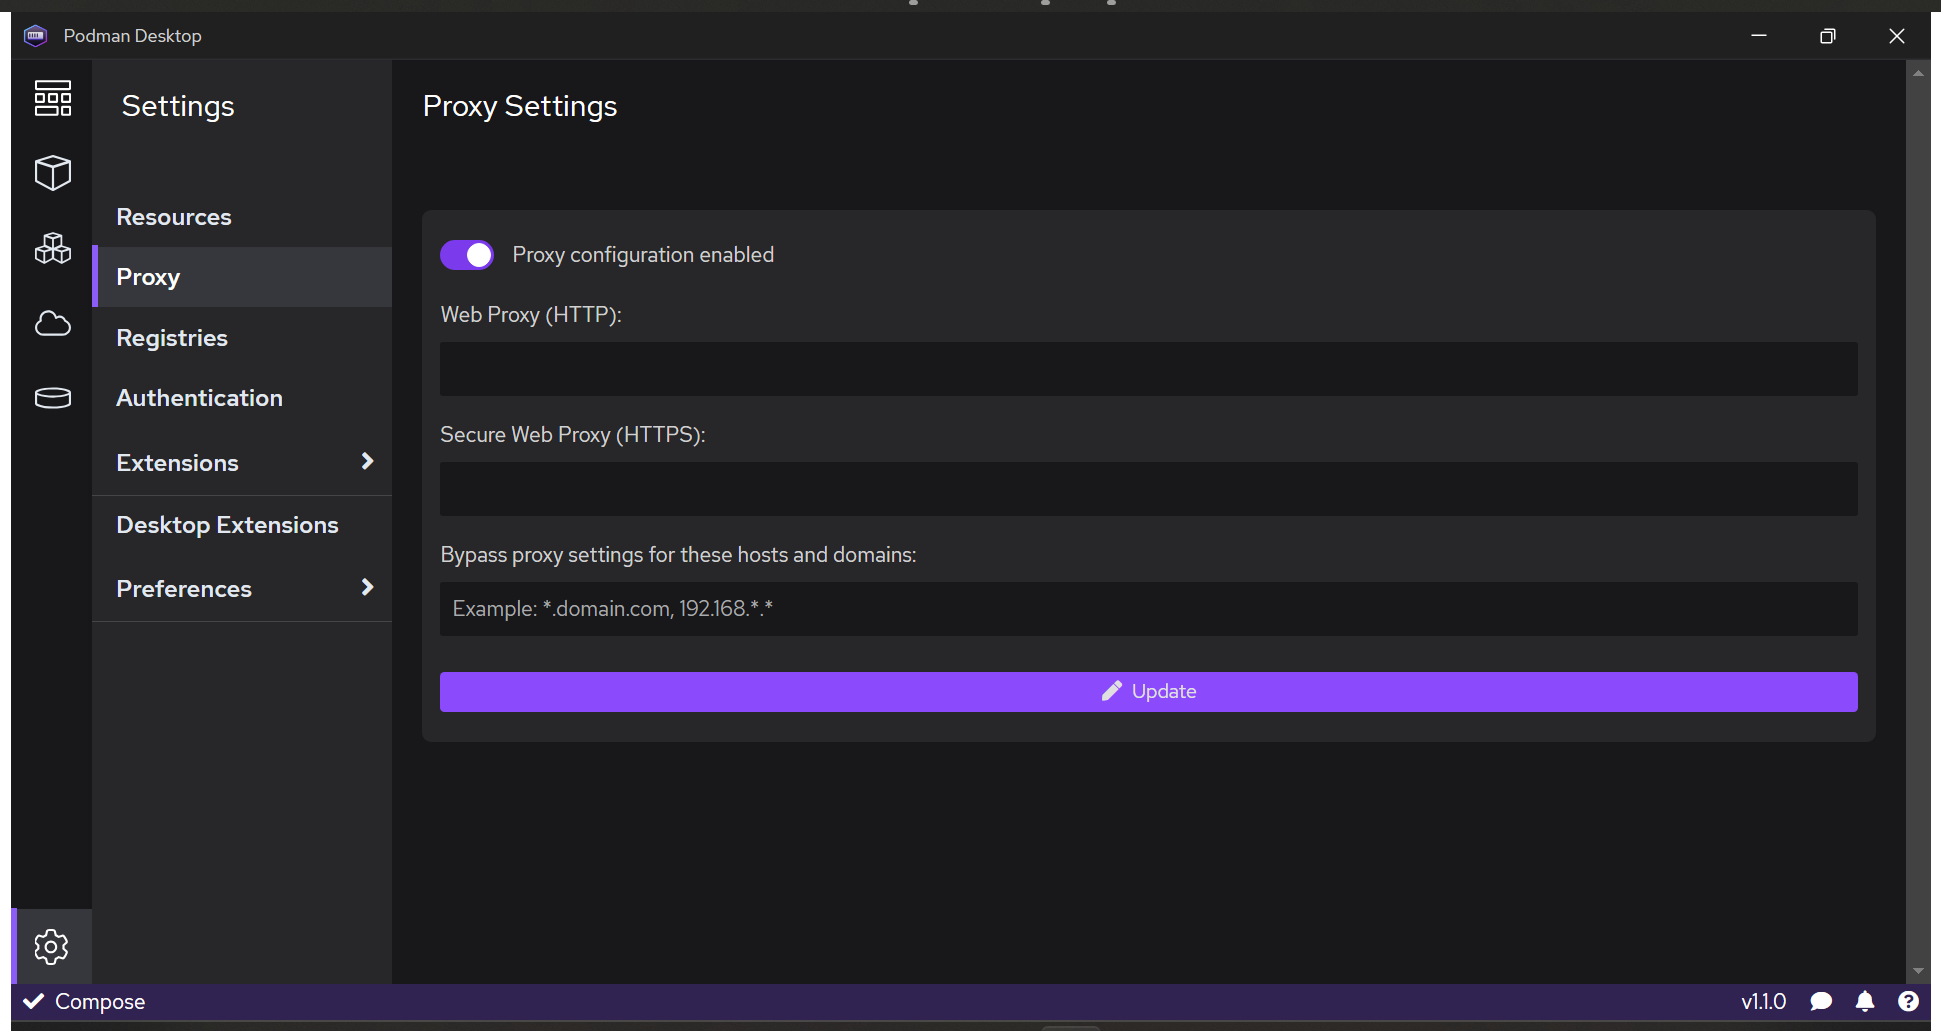
VPN and proxy
Image registry
Install in a restricted environment
Bridge between local and remote
Connect and deploy to remote OpenShift/Kubernetes clusters
The basics
Initializing and running Podman
Prerequisites
Windows or macOS.
Podman (binary) is installed.
Procedure
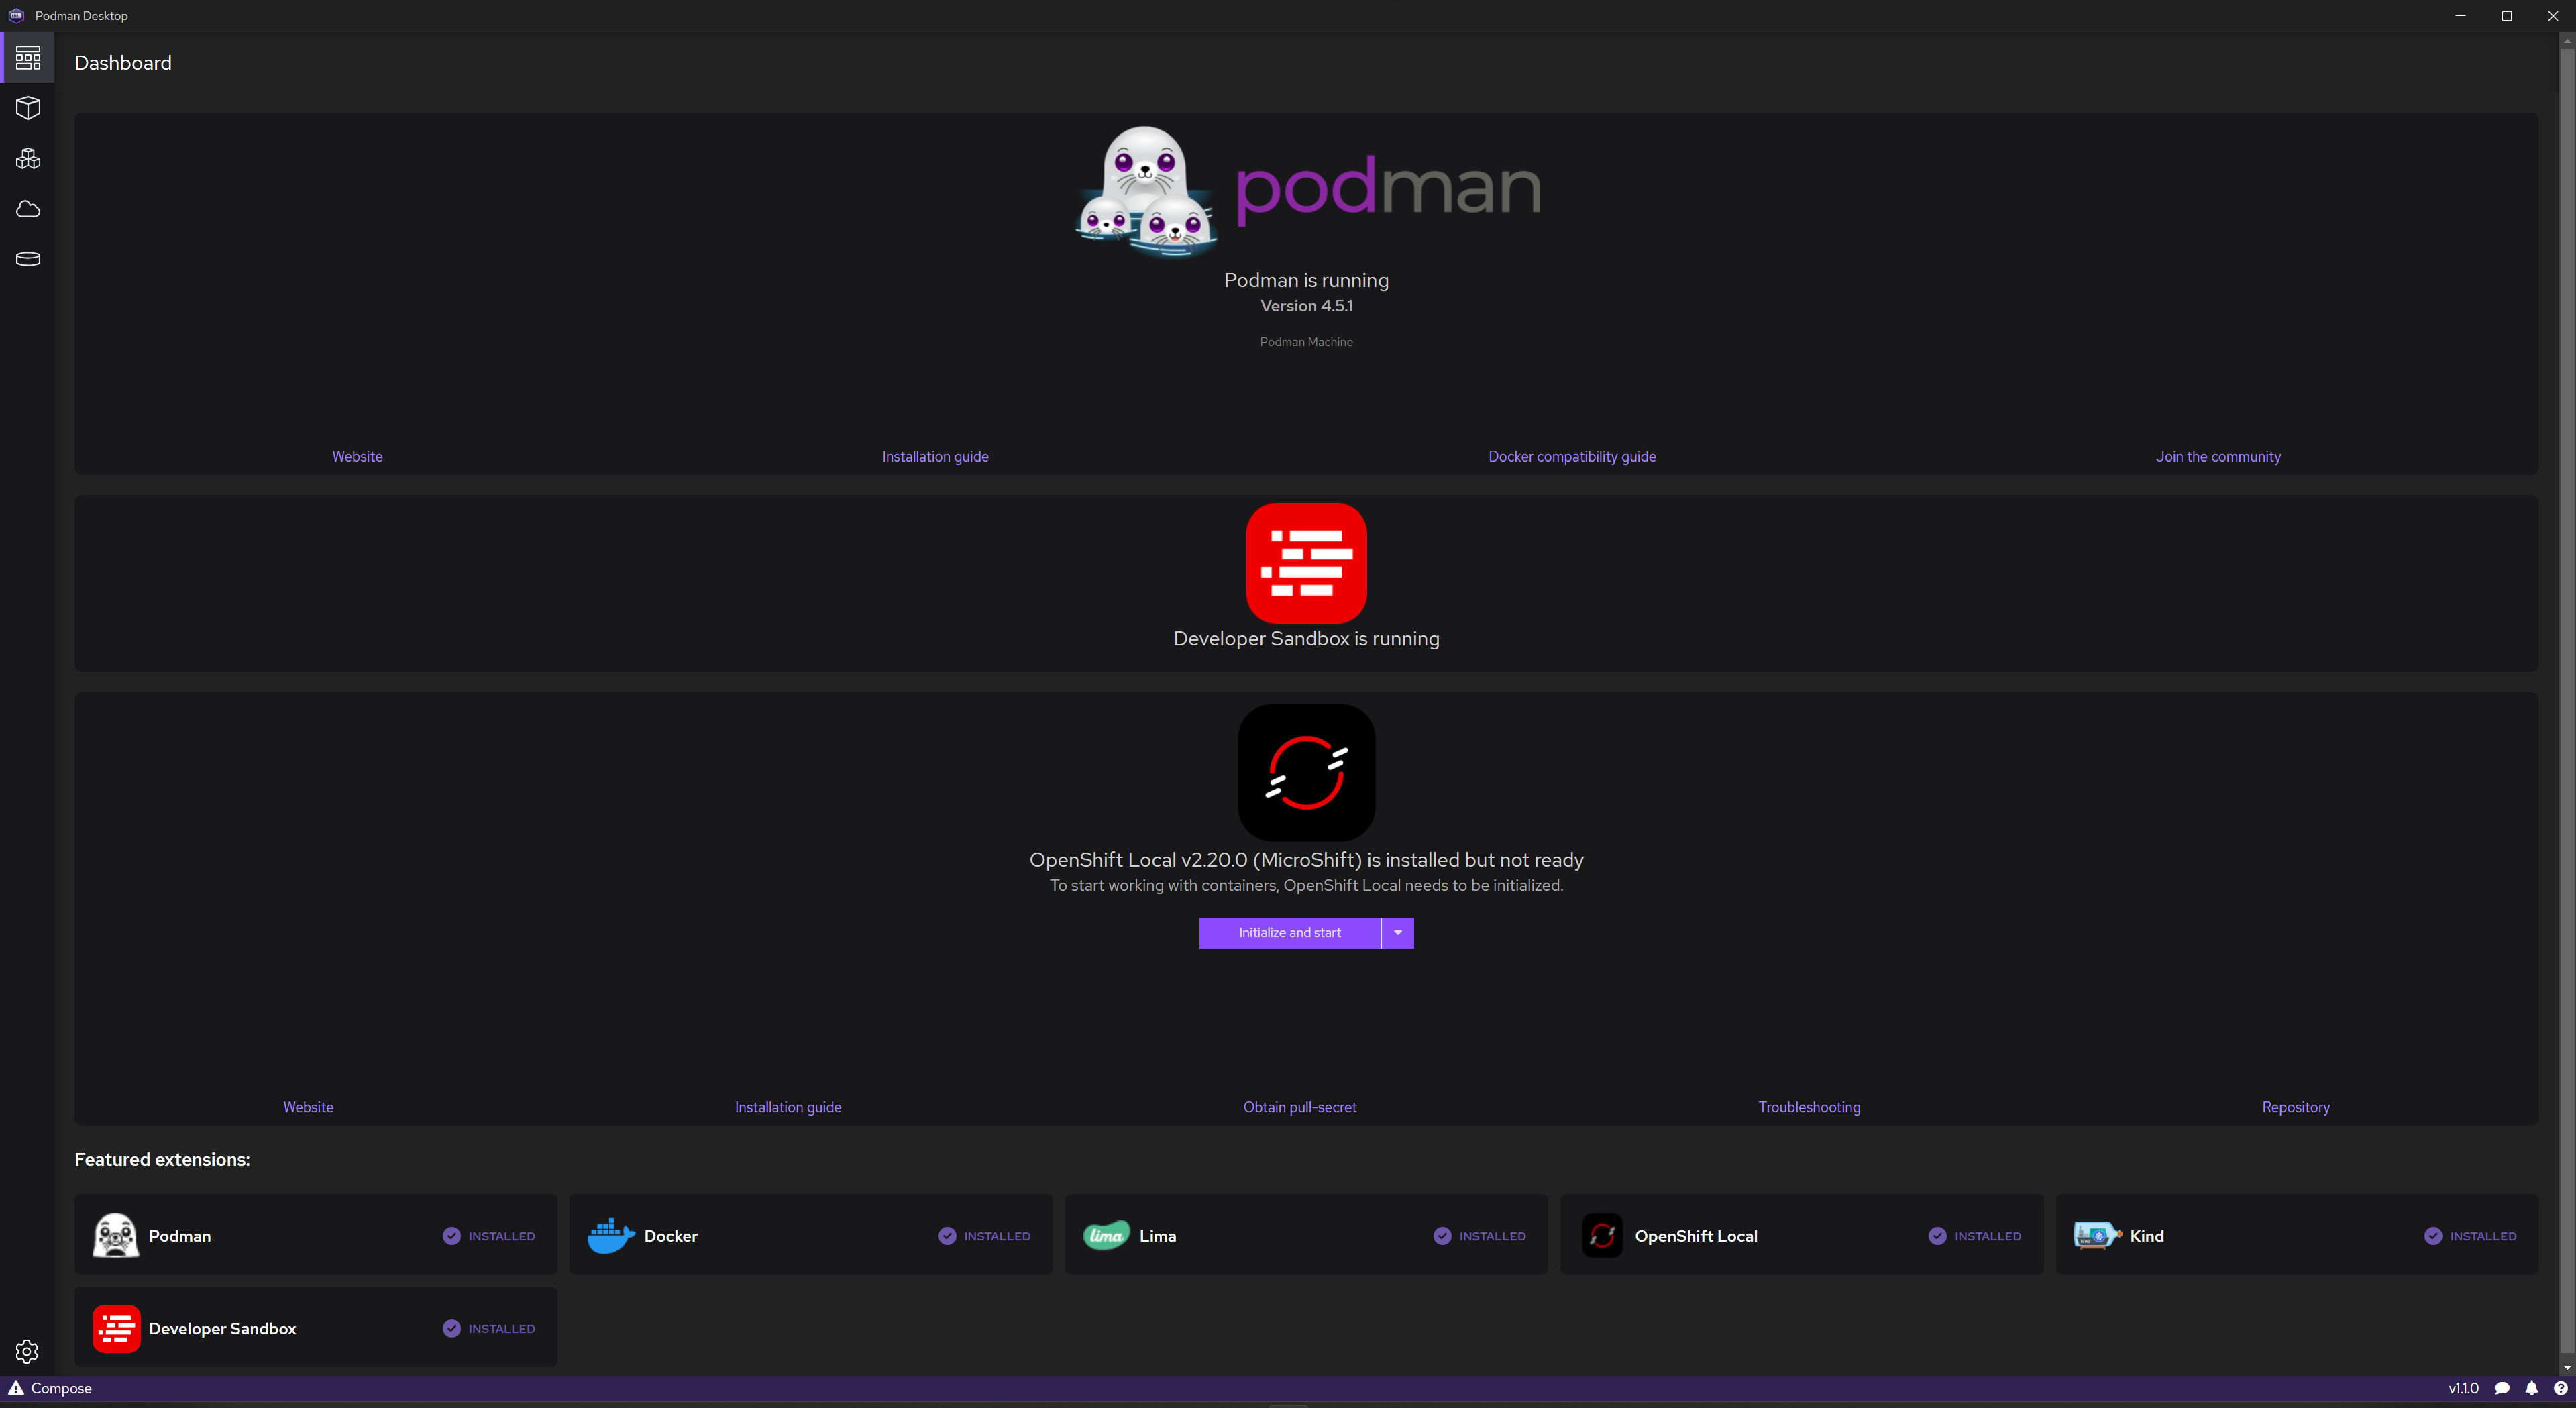
Go to Dashboard.
On the Podman tile, click Initialize and start.
Verification
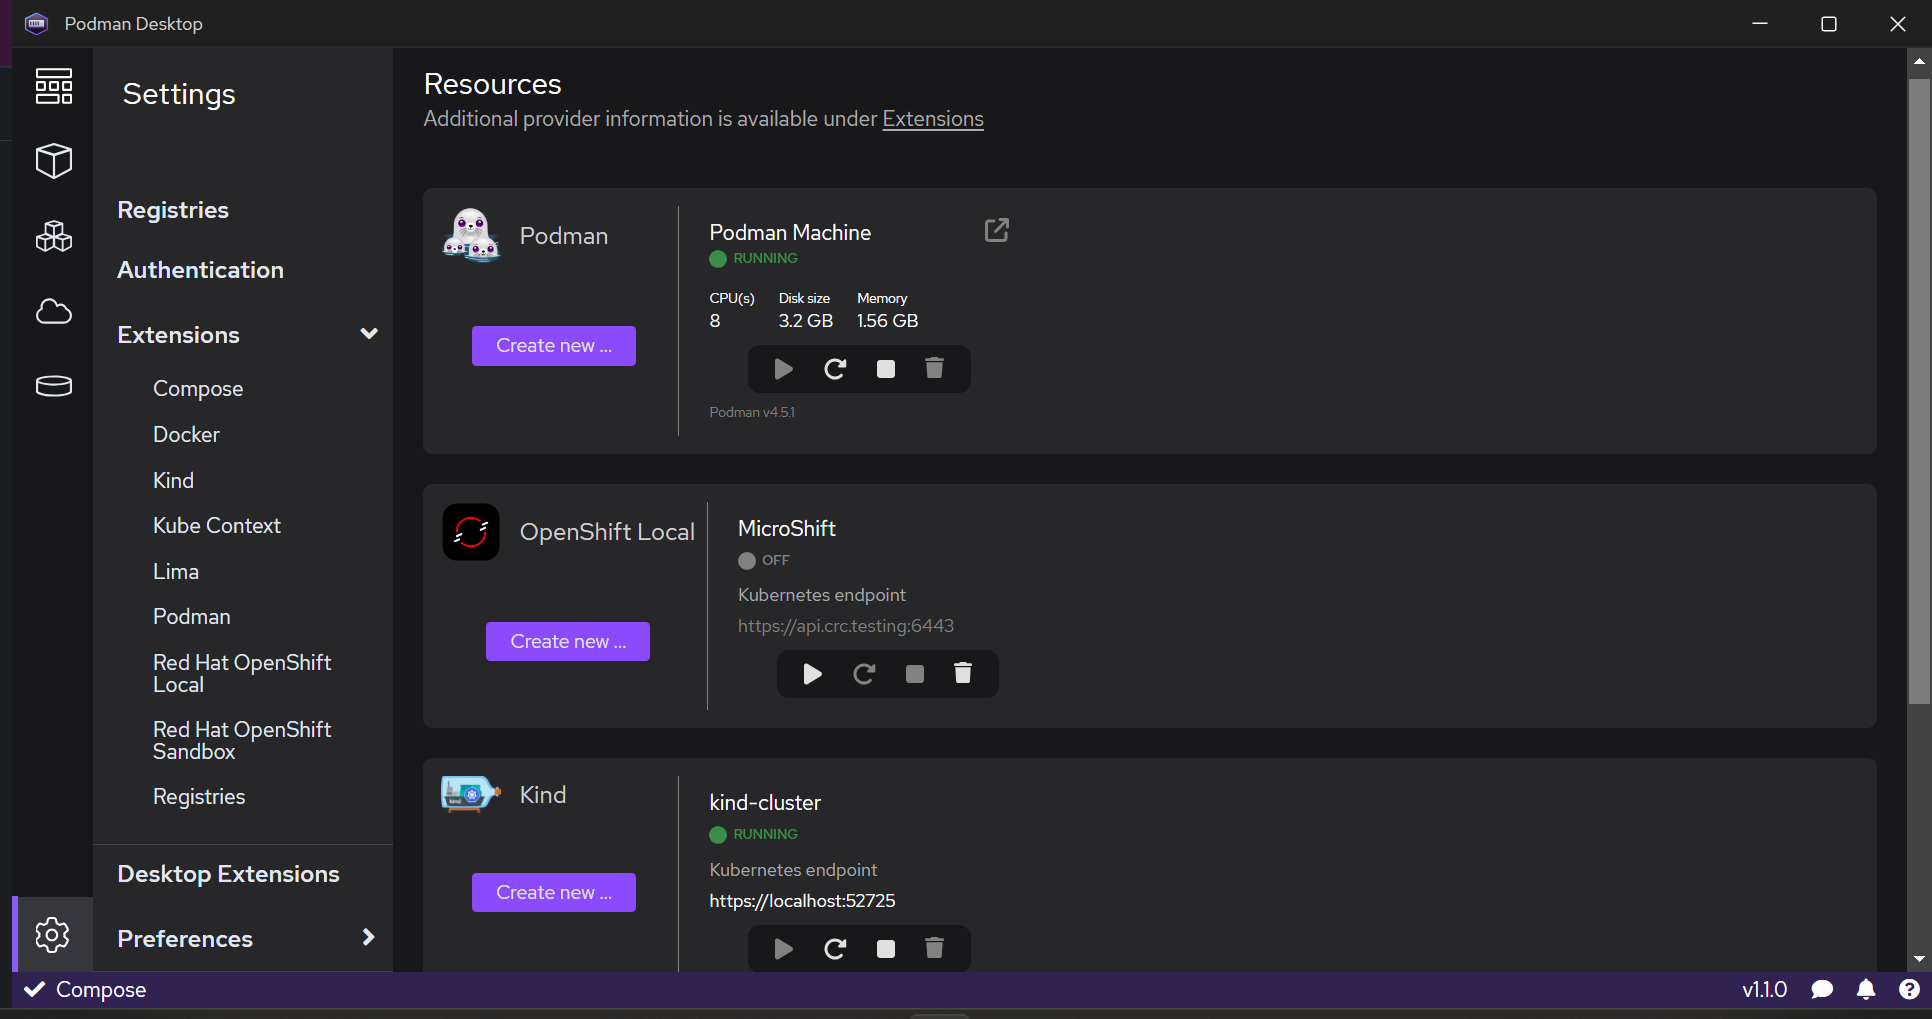
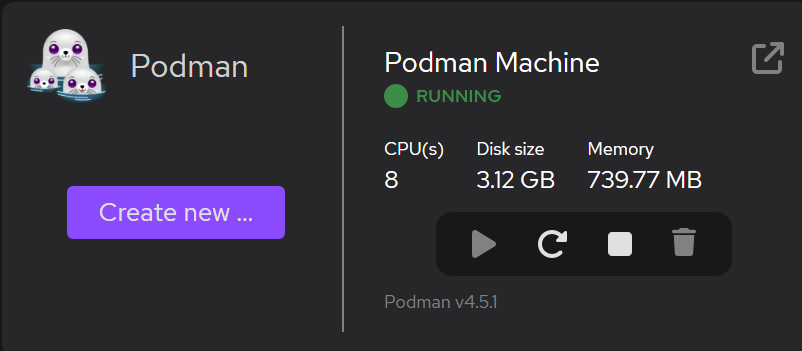
Go to Settings > Resources.
On the Podman tile, your Podman Machine is running.
The Restart and Stop buttons are active.
Initializing and running Podman
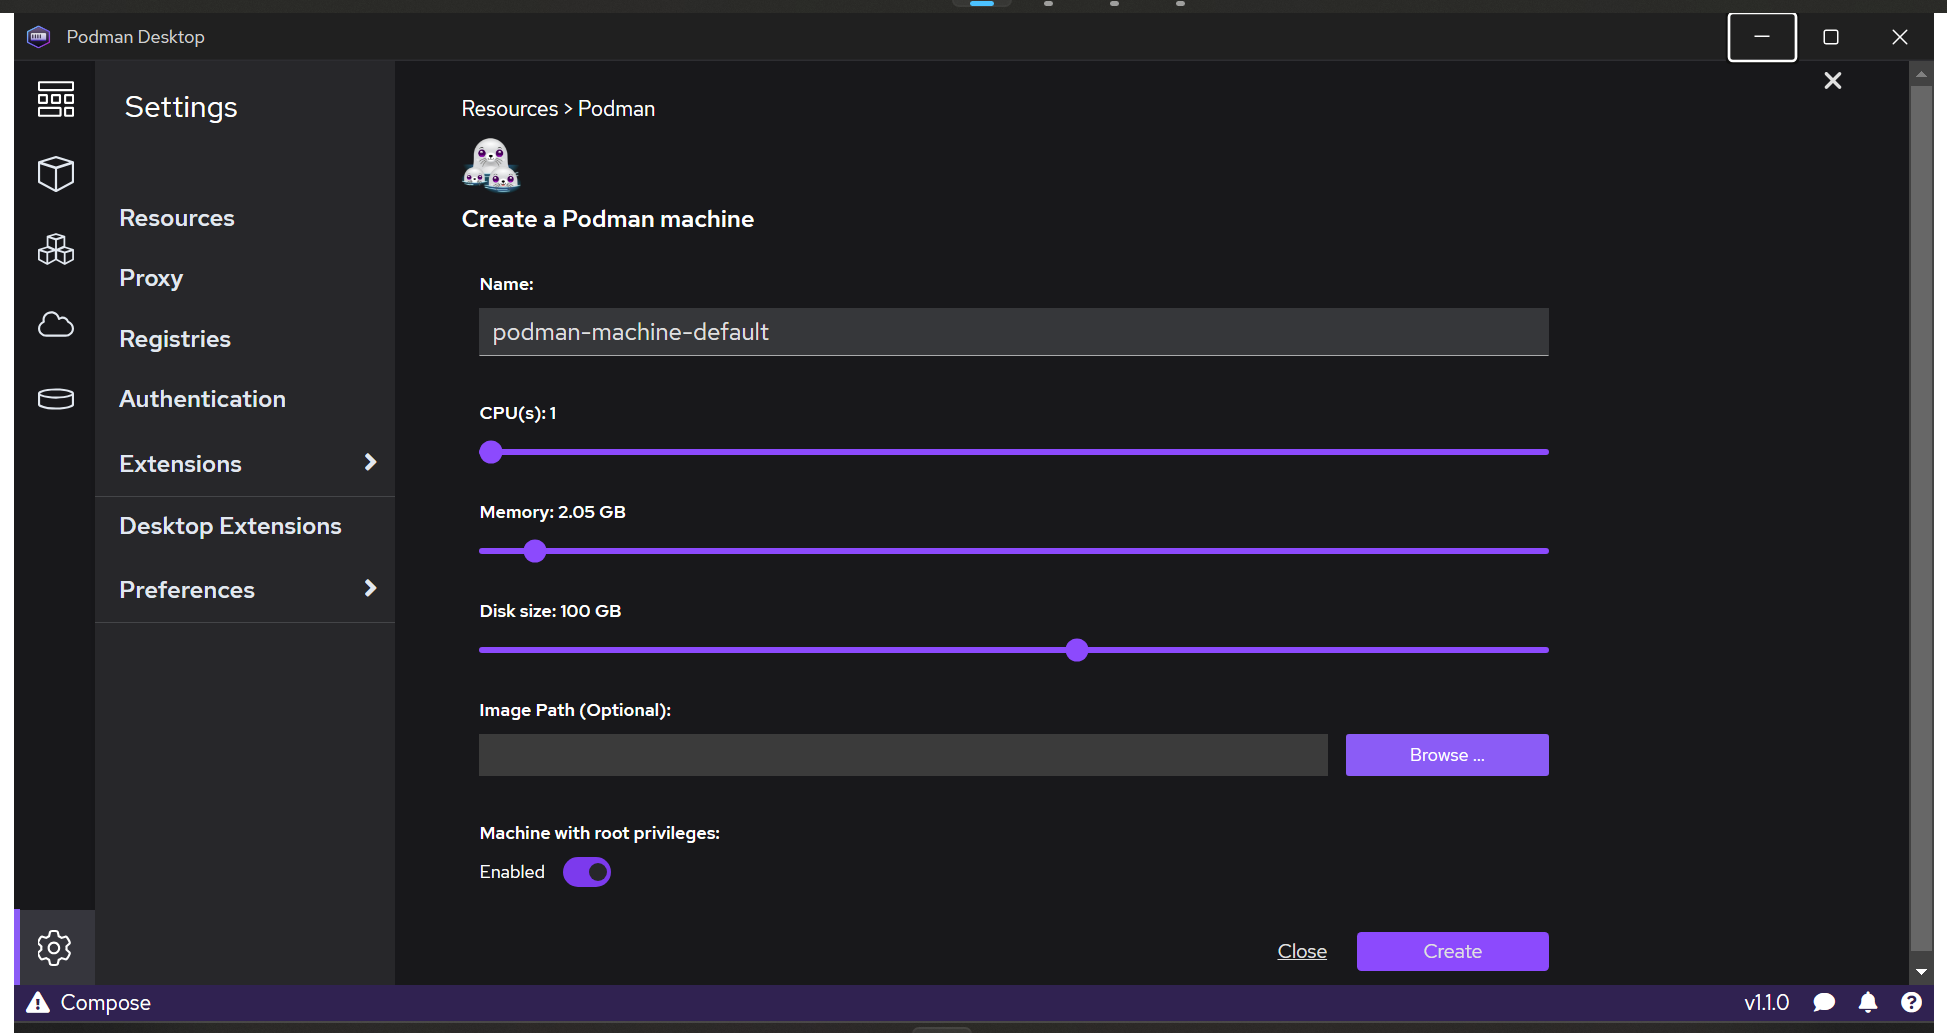
Initializing and running a Podman machine with root privileges
Procedure
Go to Settings > Resources.
On the Podman tile, click Create new.
Machine with root privileges: set to Enabled.
Click Create.
Pulling an image
Pulling an image (screenshot)
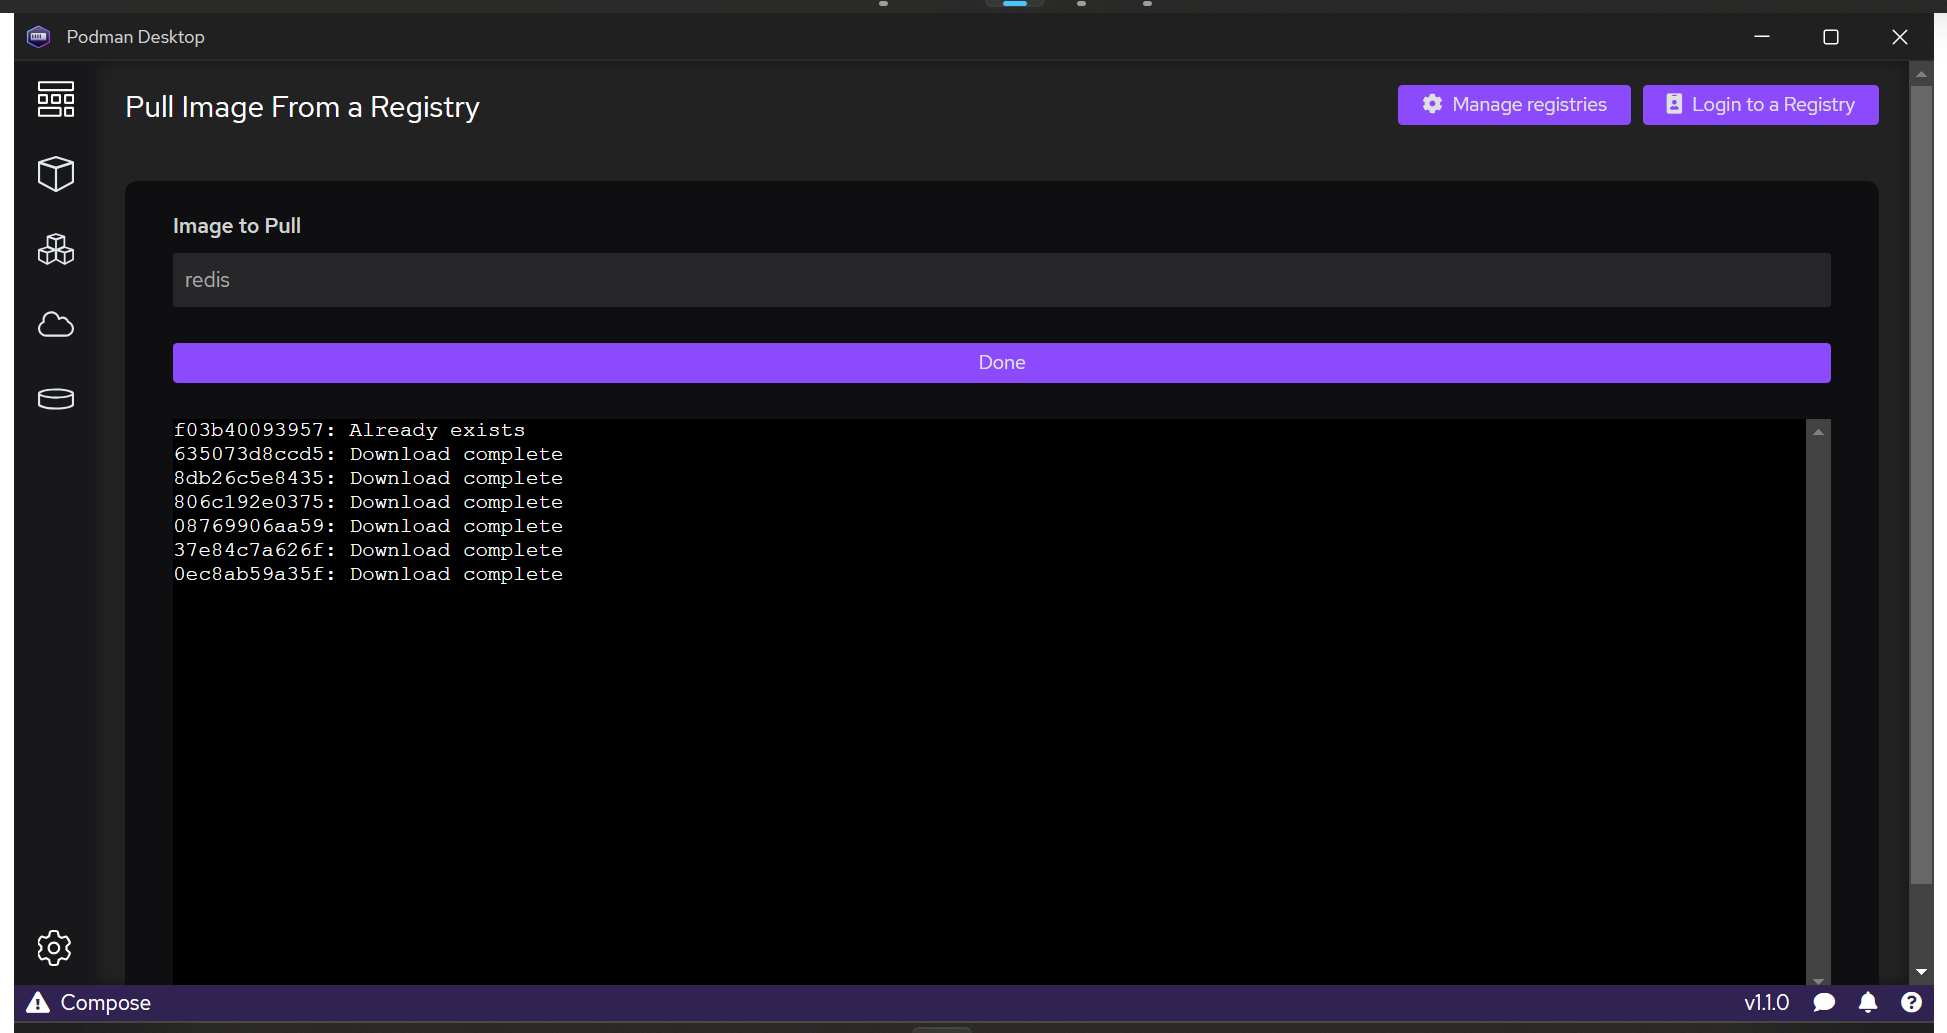
Pulling an image (screencast)
Pulling an image and starting a container
Starting a container
Starting a redis container (screenshot)
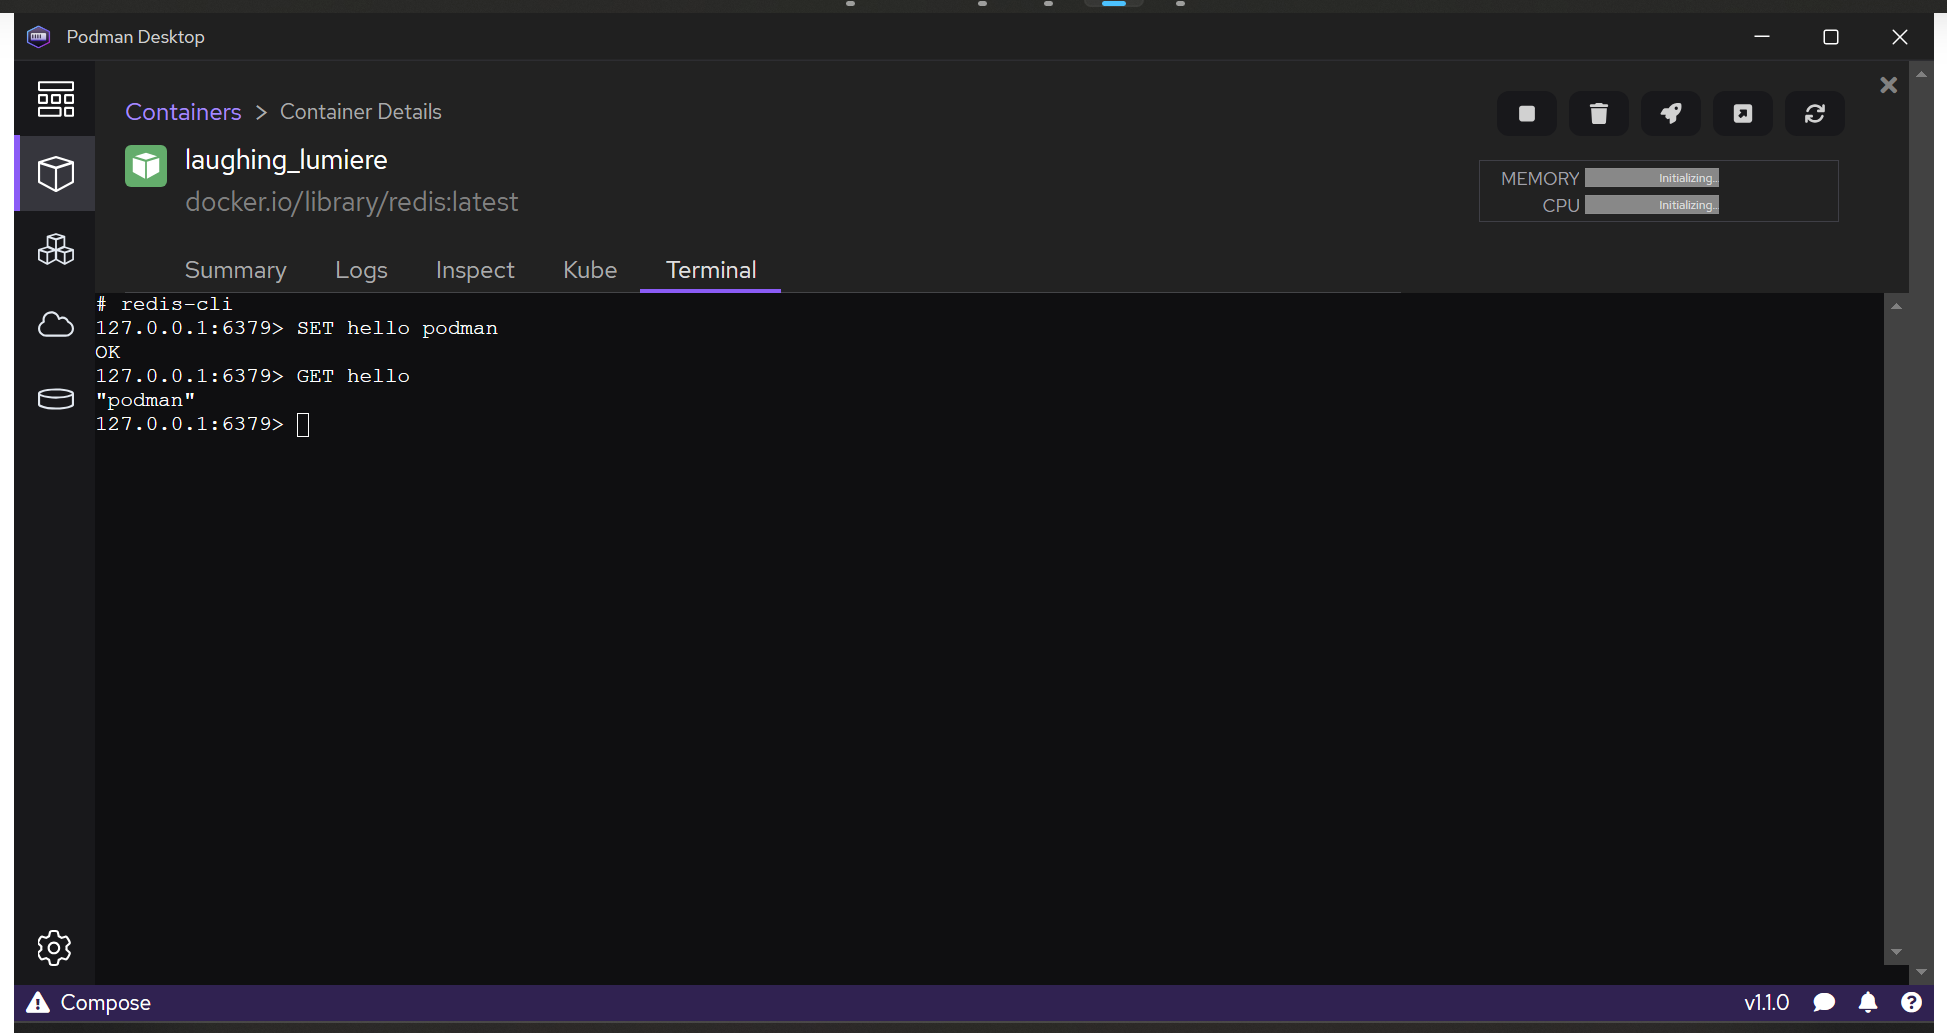
Starting a redis container (screencast)
Pulling an image and starting a redis container
Starting a container from an image that exposes a port
Starting a nginx container (screenshot)
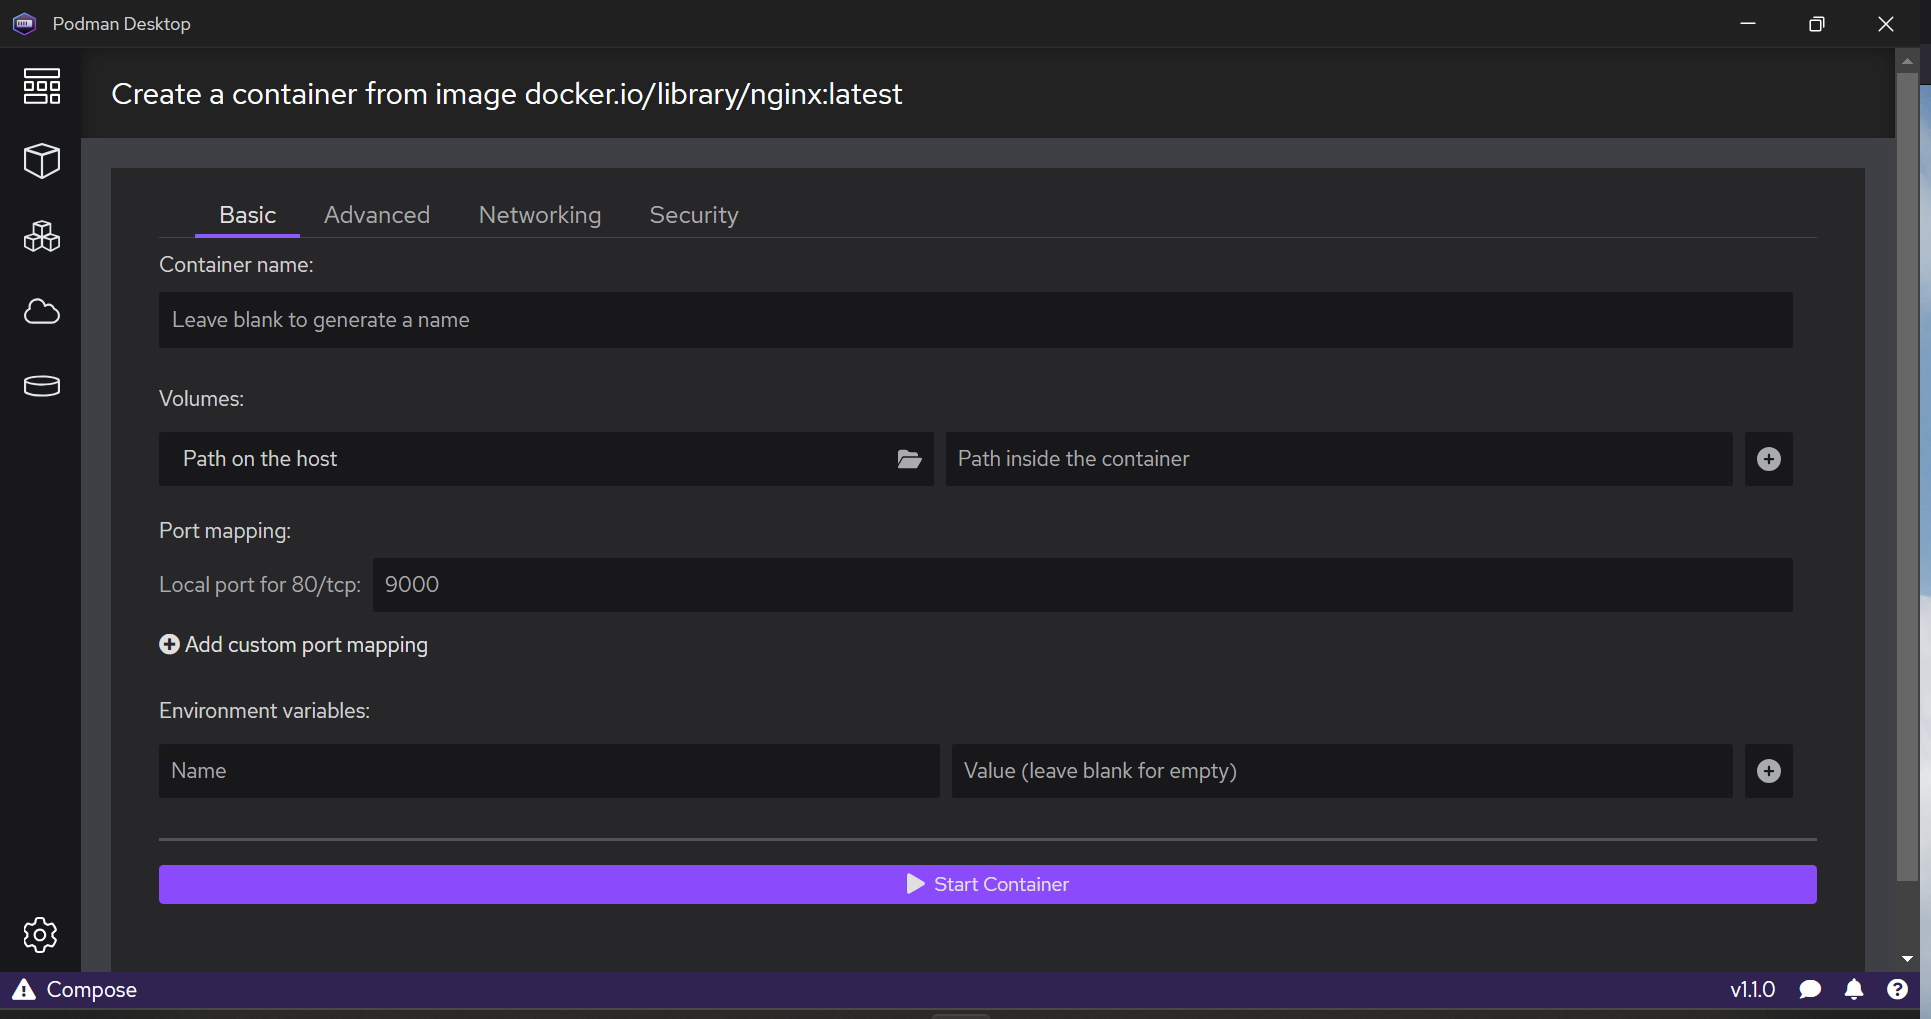
Starting a nginx container (screencast)
Building an image from Containerfile
Building an image from Containerfile (screenshot)
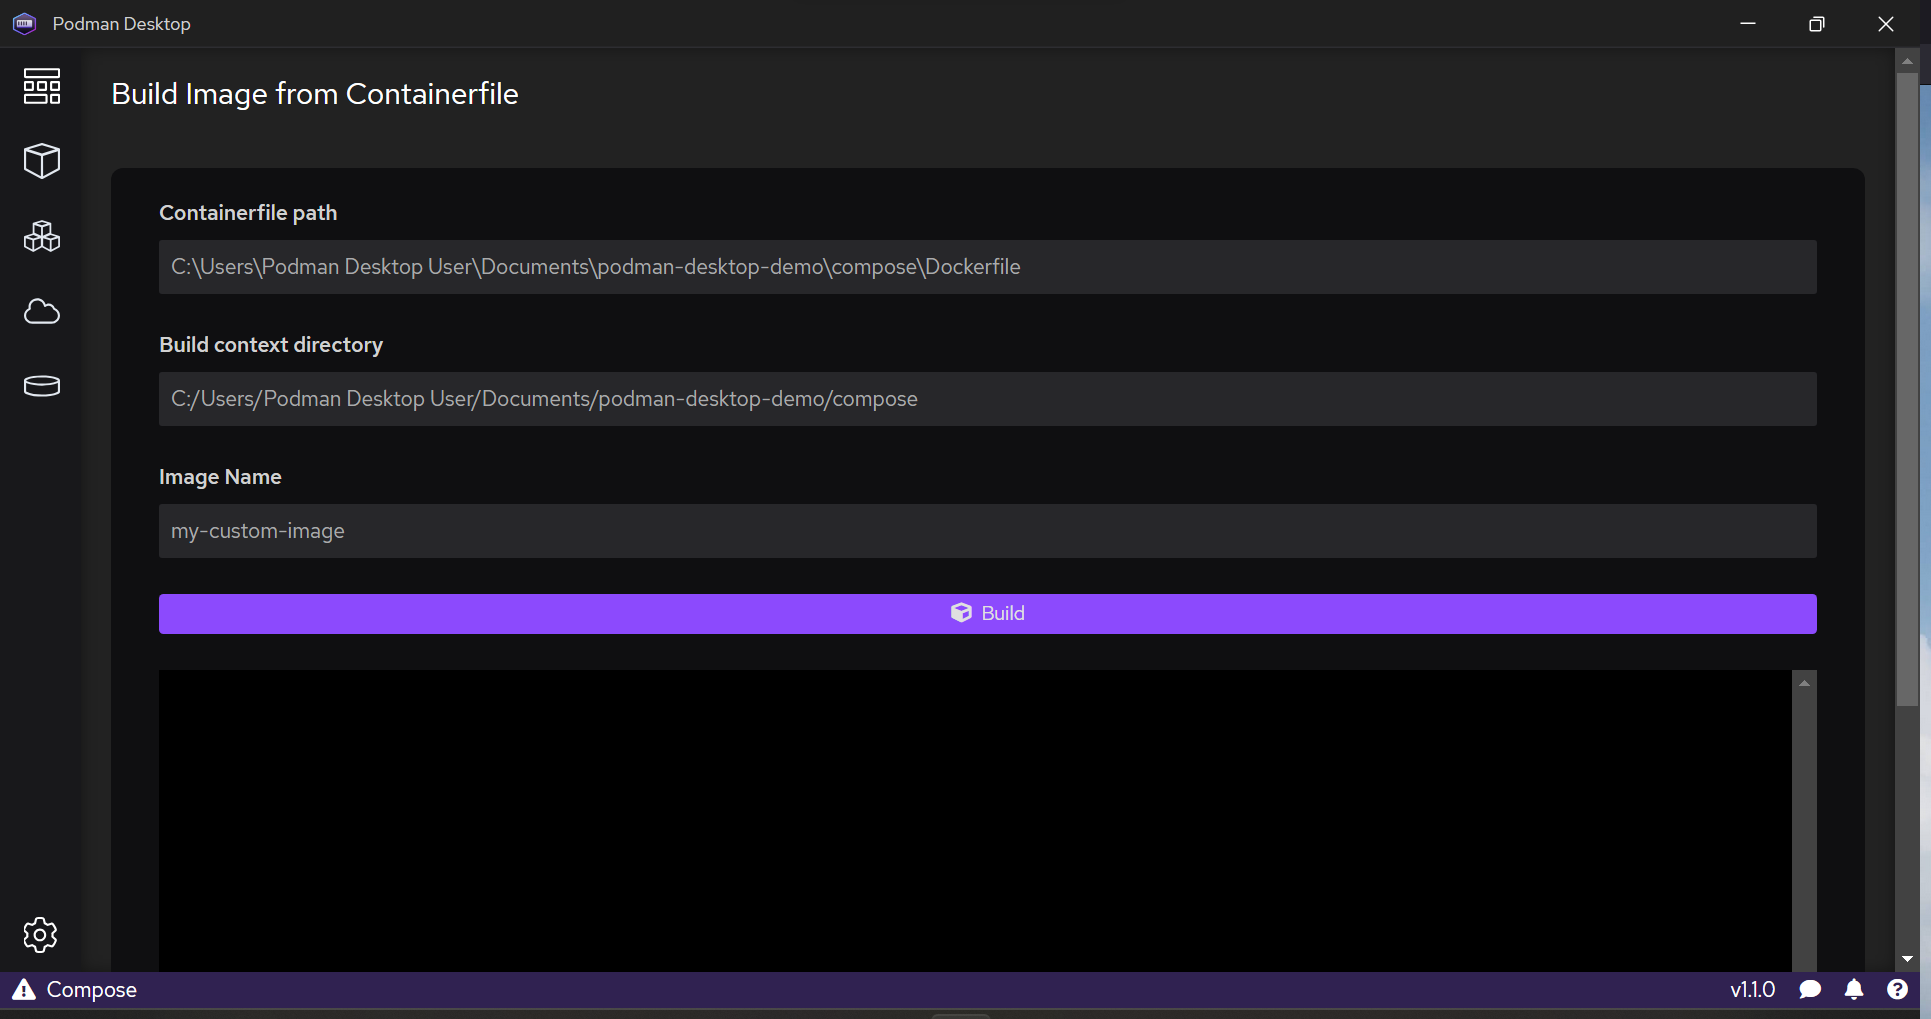
Building an image from Containerfile (screencast)
Support for OCI Registries
Configuring a pre-configured registry
Configuring a registry (screenshot)
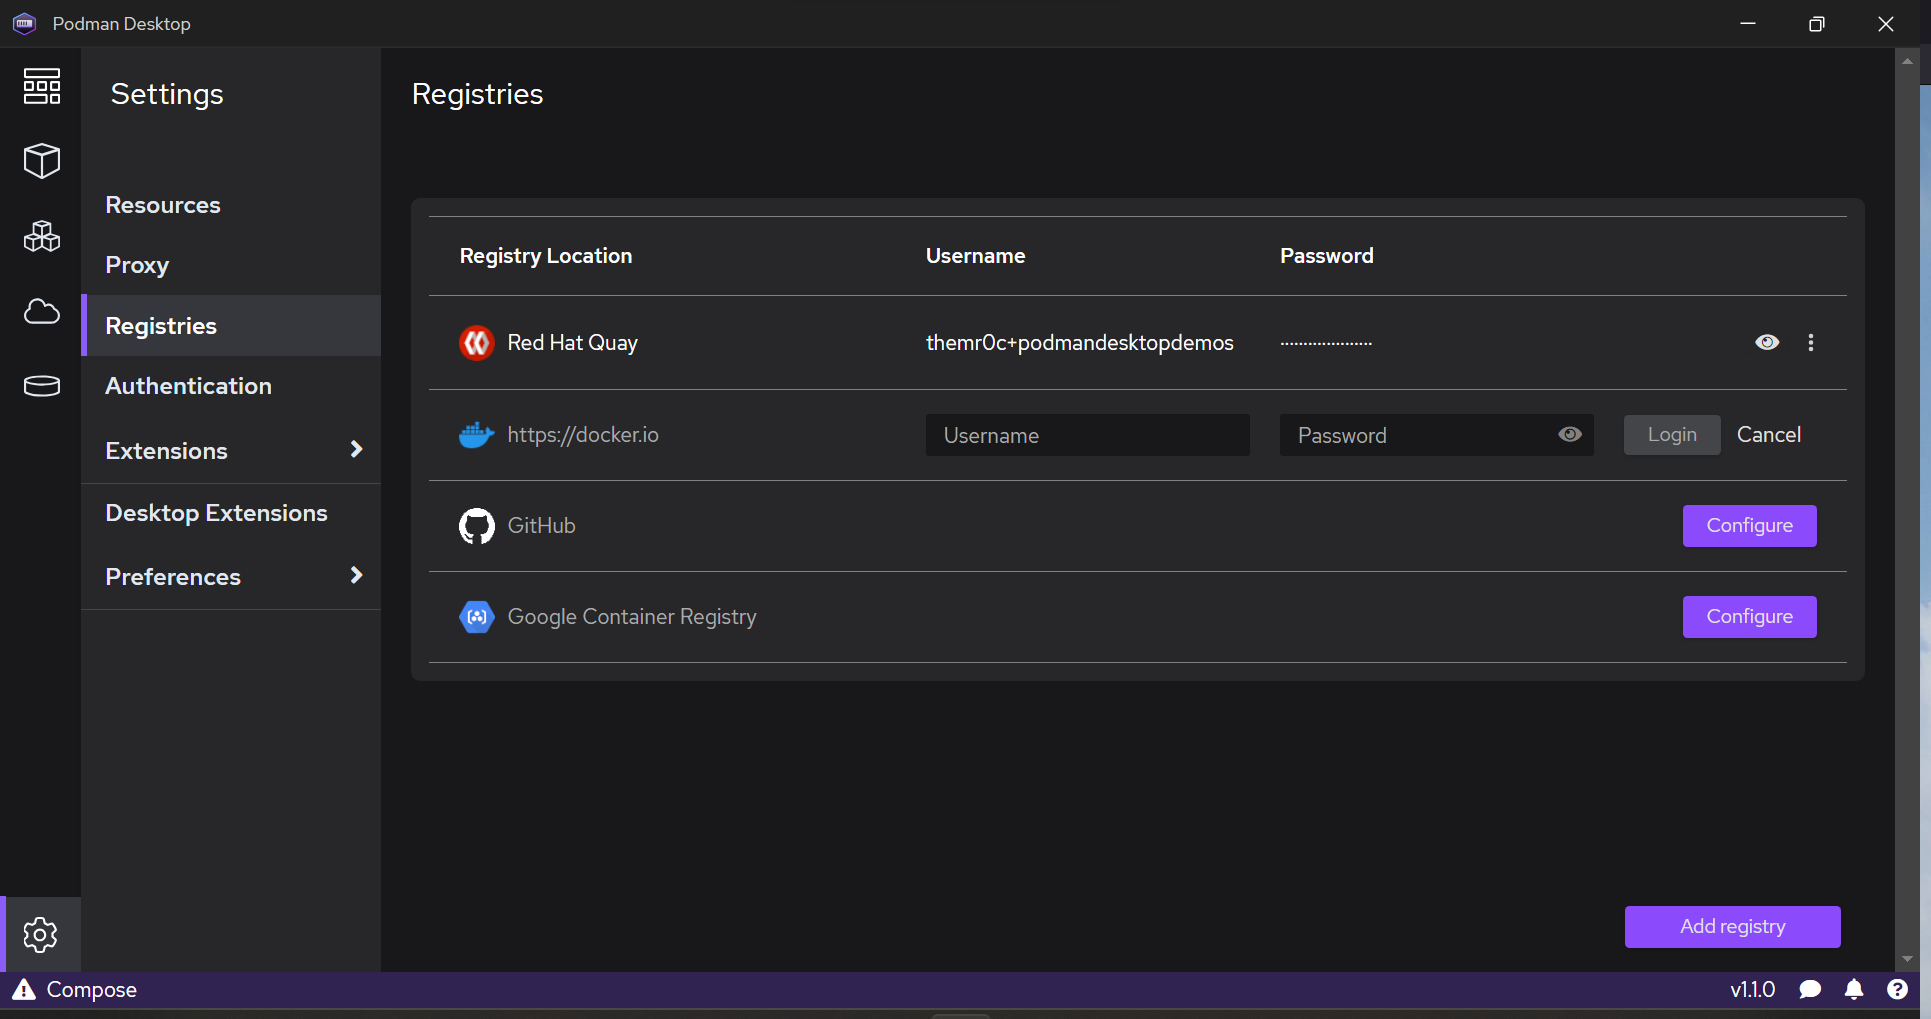
Configuring a registry and pushing an image to the registry (screencast)
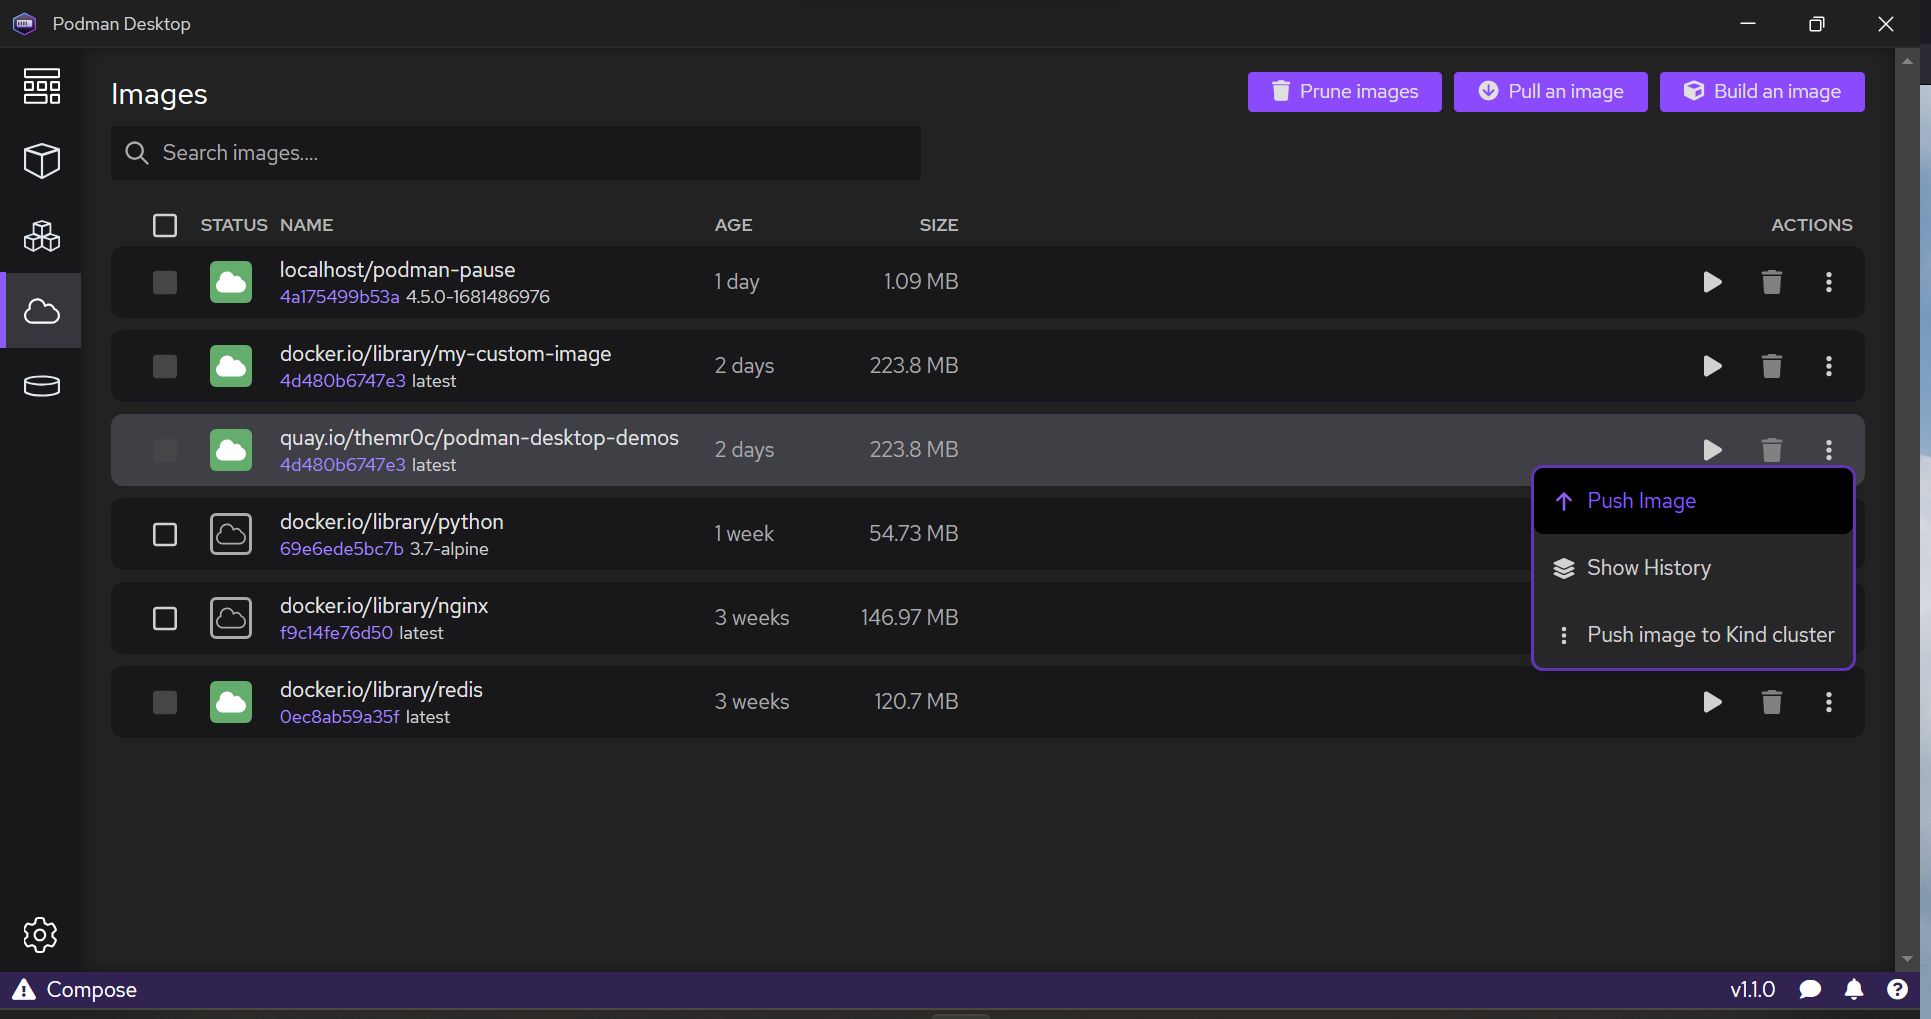
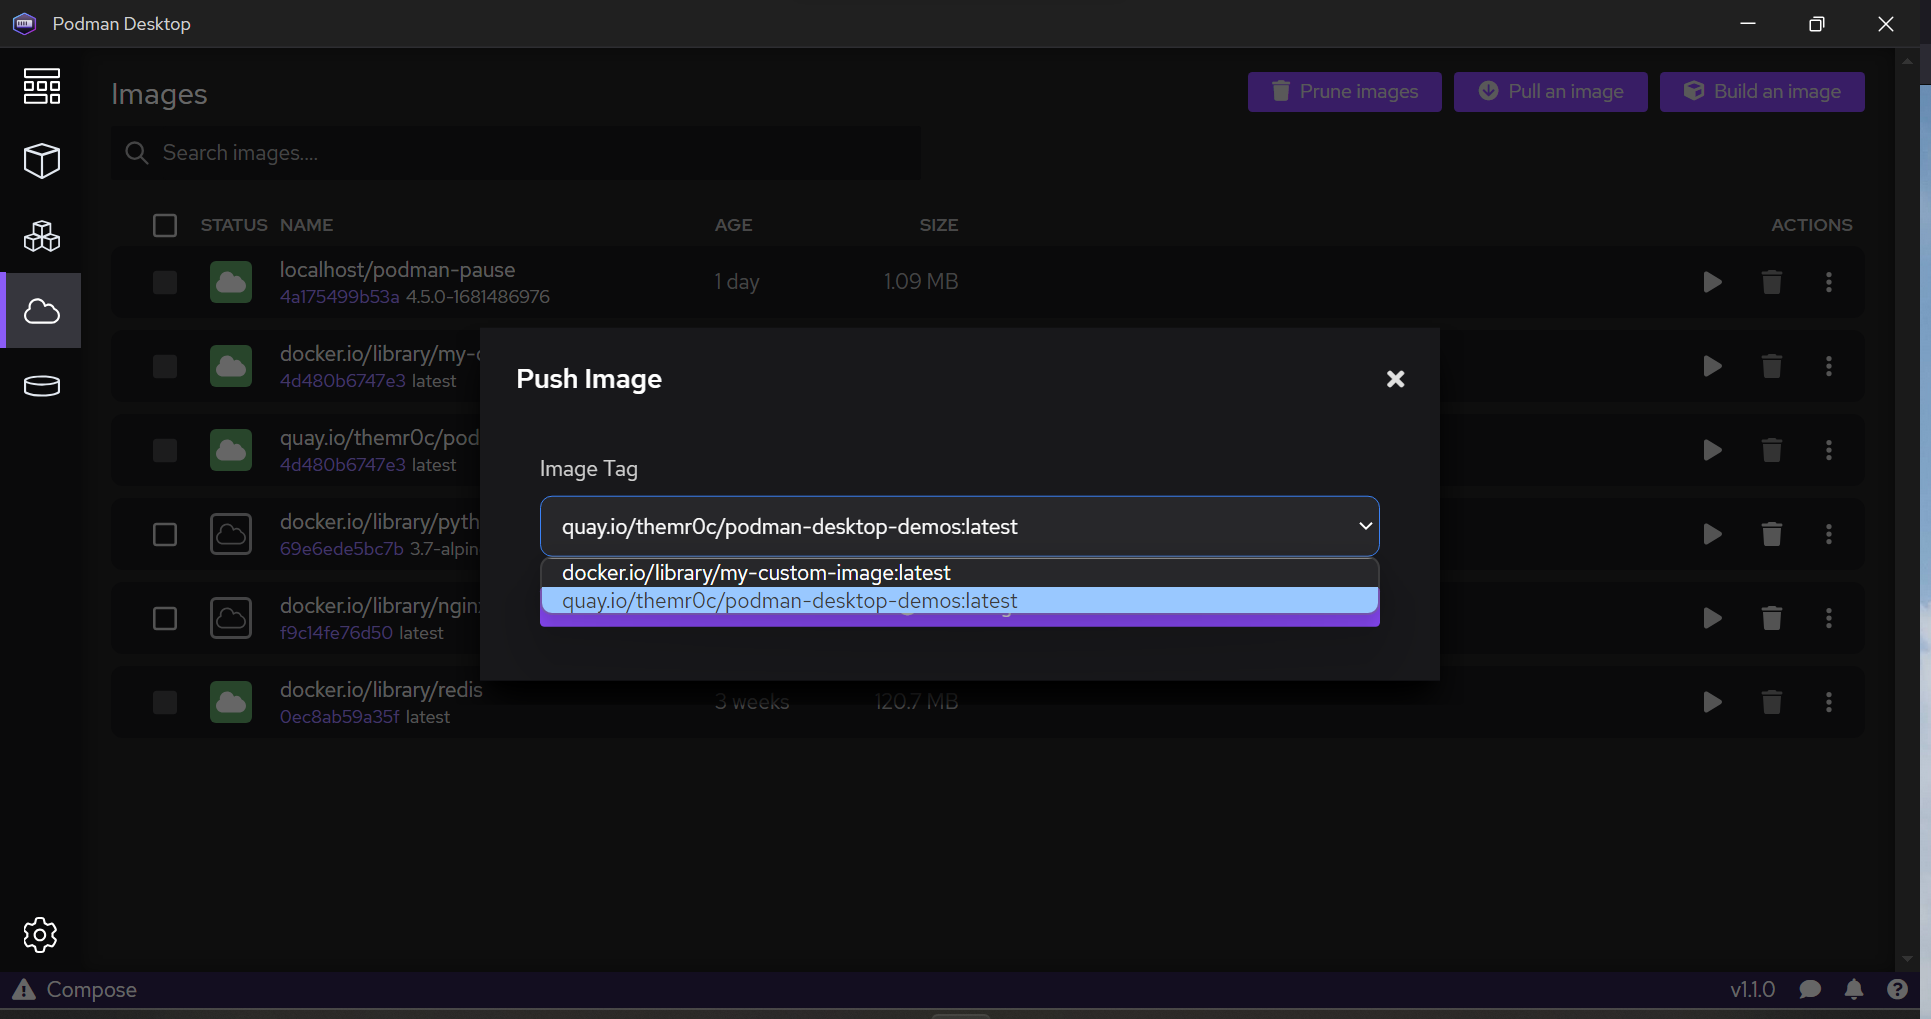
Pushing an image to a registry
Pushing an image context menu
Pushing an image: selecting image tag
Podman pods
Selecting containers to run in a pod
Selecting containers to run in a pod (screencast)
Selecting containers to run in a pod (screencast)
Selecting containers to run in a pod (screencast)
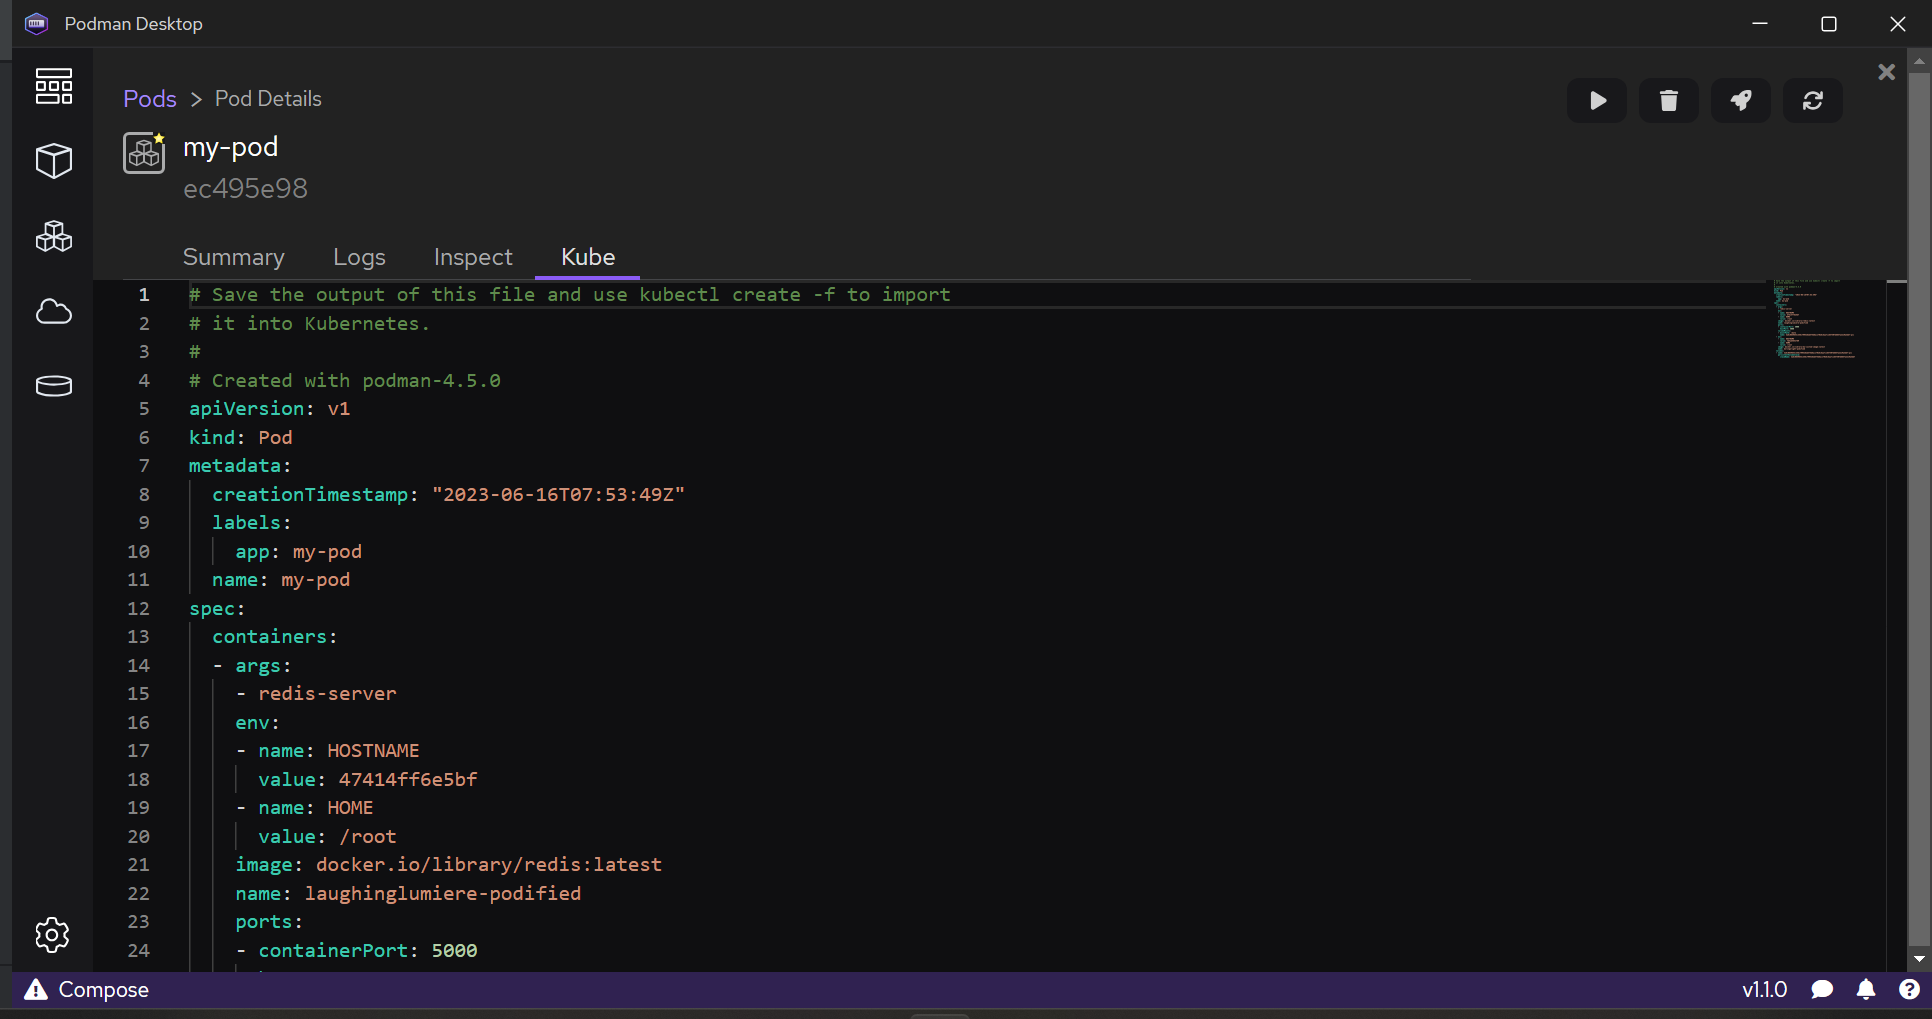
Generating Kubernetes YAML from a pod
Prerequisites
A pod.
Procedure
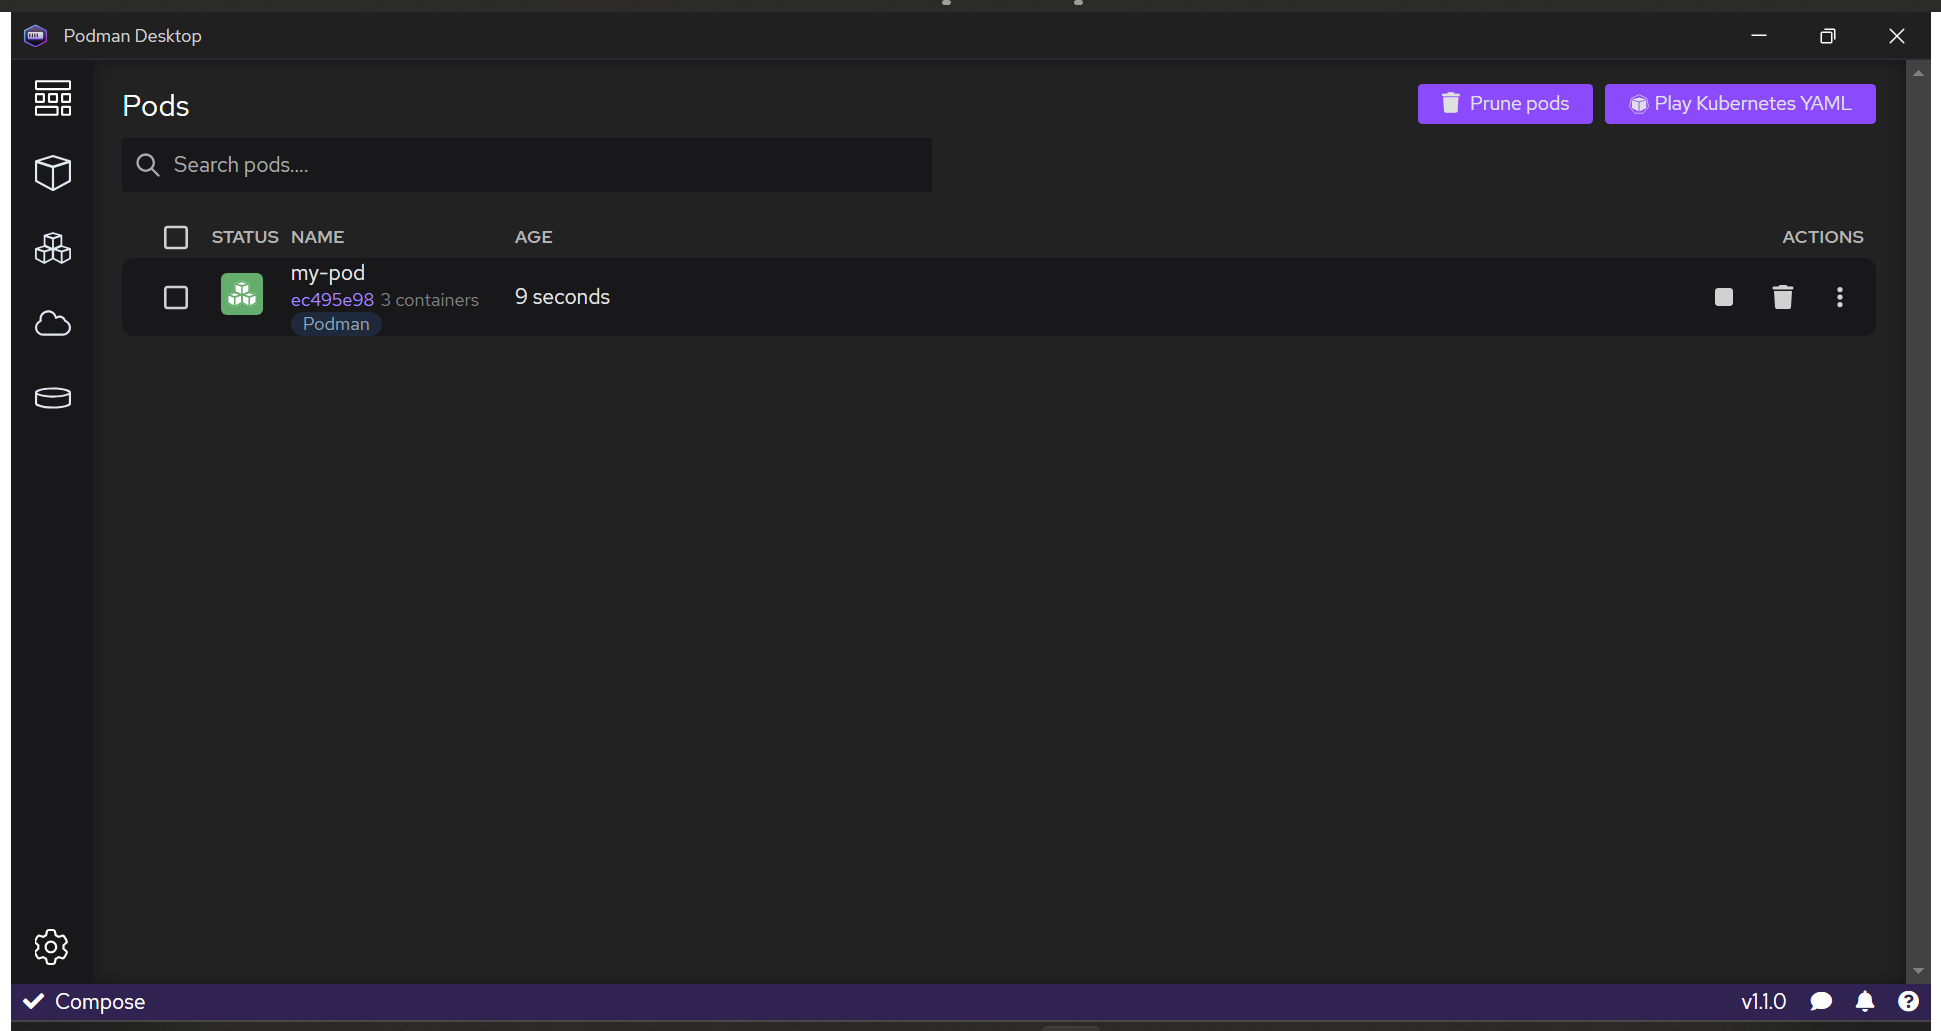
Go to Pods.
Click the pod.
Go to Kube.
Select and copy all the content.
Starting a pod from a Kubernetes YAML file
Starting a pod from Kubernetes YAML (screencast)
Podman Desktop extensions
Podman
Docker
Lima
OpenShift Local
Kind
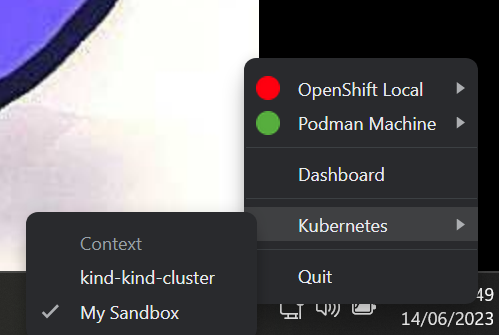
Developer Sandbox
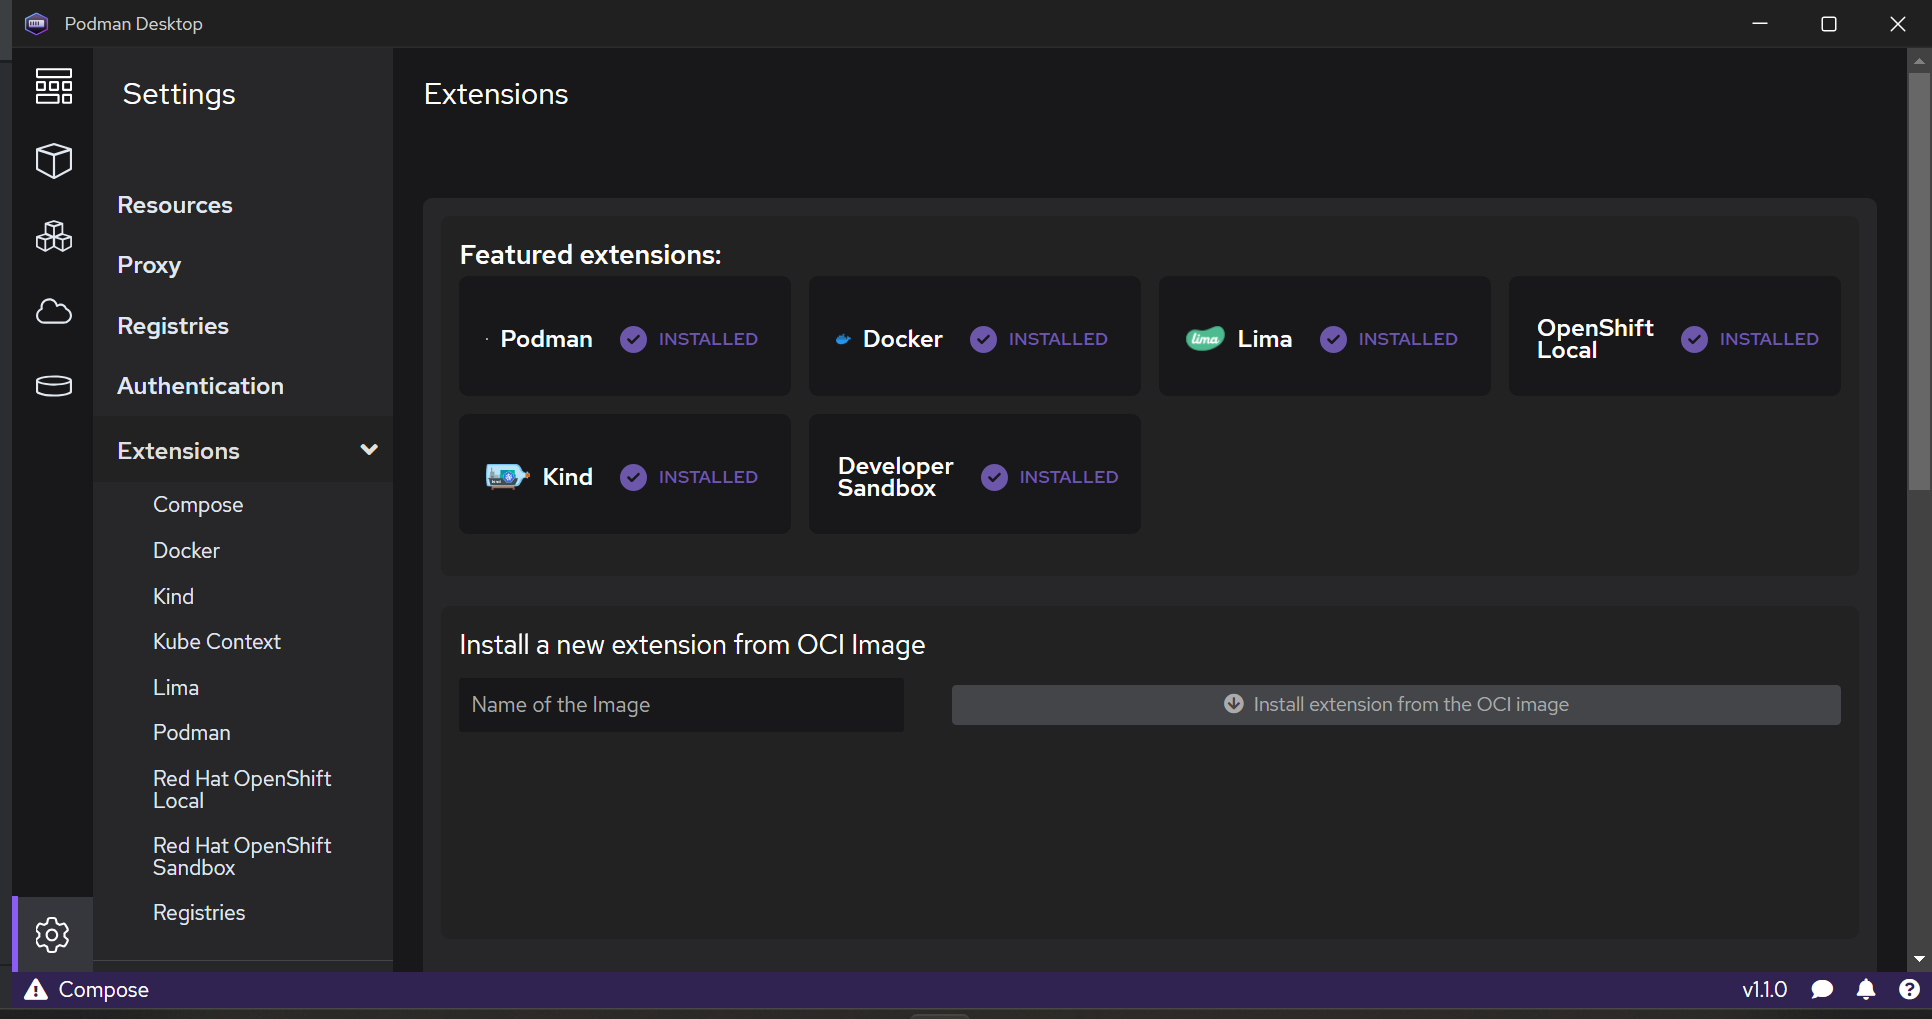
Installing software from Podman Desktop
Choosing a Kubernetes distribution
Developer Sandbox
Installing Developer Sandbox
Configuring Developer Sandbox
Deploying a pod to Developer Sandbox (screencast)
OpenShift Local
Installing OpenShift Local (screencast)
Playing Kubernetes YAML on OpenShift Local
Deploying to OpenShift Local
Pushing an image to OpenShift Local
Kind
Creating a Kind cluster (screenshot)
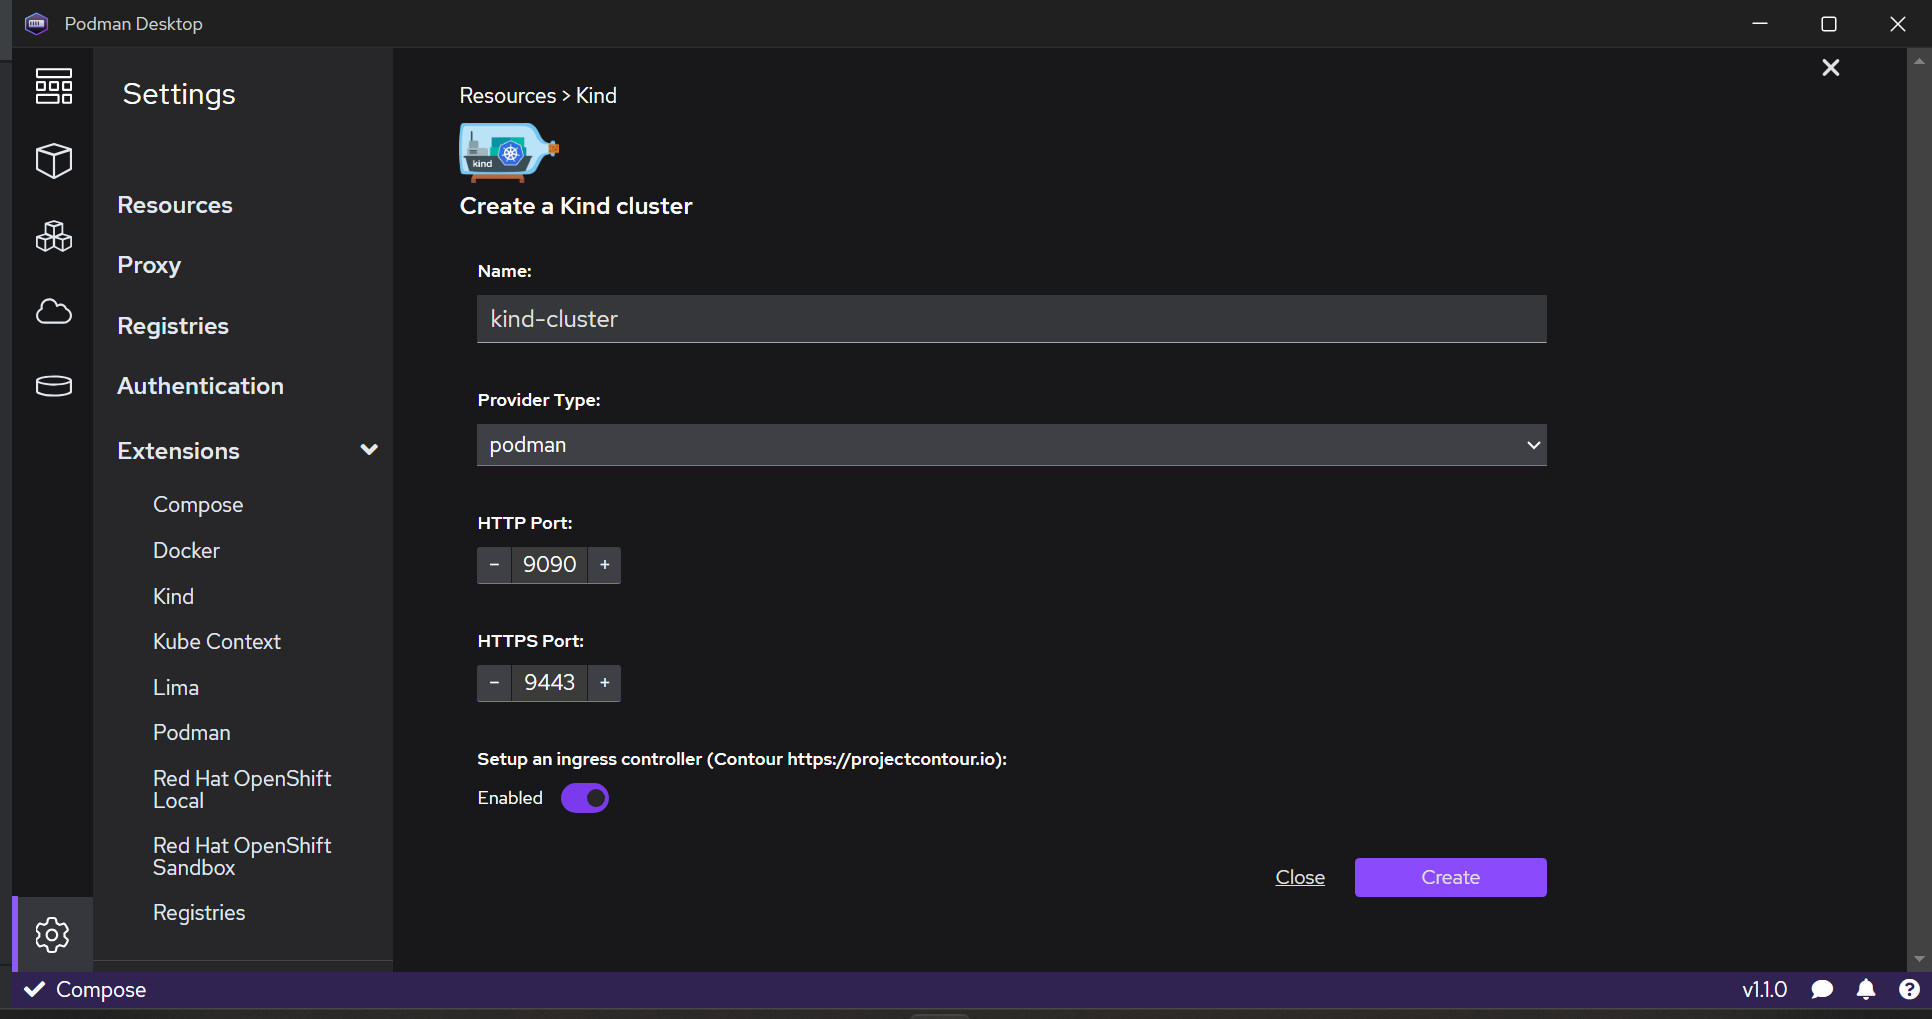
Kind in the resources screen